For the safety of our residents, this year BHC has made the hard decision not to host our annual End of Year Celebration for residents. This was a hard decision, but we wanted to put the health and safety of our resident’s first and find a different way to spread some end of year cheer.
One of our Housing Managers came up with the idea of having BHC staff share the recipes, craft and activities they would usually do at this time of year. We hope you will enjoy seeing what we get up to and maybe even try some of these ideas yourself!
___
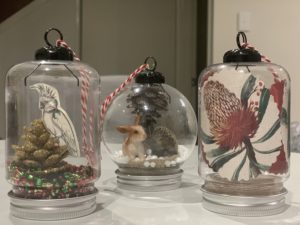
DIY Christmas Ornaments (or for any occasion)
BY KAITLYN, Community Development Manager
You will need:
Empty Christmas ornament – we found ours at Kmart for $3 each
Hot glue gun or strong craft glue
Mounting tape or double-sided tape
Whatever you would like to fill your ornament with!
Here’s what we included in each one, including costs!
- confetti, a mini glitter pinecone (purchased as a pack for $4 from Big W) and a cut out of a cockatoo from some Christmas cards
How: glue the mini pinecone to the lid of the ornament, glue the bird in the pinecone, turn the ornament upside down and put in as much confetti as you like, reattach lid.
- native flower cut outs from card
How: We purchased some Christmas card, but you could also use old cards, wrapping paper, etc. You can either use double sided tap or clear glue to attach this inside, or if the pieces fit together they can hold themselves in place.
- card board cut into circles to build a base, small animal figurines (purchased from Toy World for $5 and $6 each), small Styrofoam balls (purchased from _ for $), mini glitter pinecone (purchased as a pack for $4 from Big W)
How: remove the lid and glue 2-3 cardboard rounds to create a base. We cut circles out of an old box that was laying around the house. Make sure the cardboard circles are small enough so the lid can still screw back on to the ornament. Glue figurines to the cardboard base. On the inside of the ornament, glue one of the mini glitter pinecones to the top of the ornament. Fill with some Styrofoam balls and screw lid back on. Now you have your own snowy woodland scene!
Ideas for future ornaments include: using LEGO figurines / creations, using old toys, filling with different kinds of glitter / confetti / tinsel, etc.
___
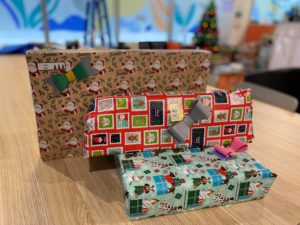
Paper BOWS
BY Chantel, Housing Manager
You will need:
- Coloured Paper or Wrapping Paper
- Scissors
- Tape or Glue
Instructions
Print and cut out the template.
Use the template to trace and cut out the shapes below in brightly coloured or Christmas themed paper. You can make these bigger or smaller depending on the size of the bow you want.
Using Bow Loop shape, flip the paper and bring the ends to the middle, making sure the colour / pattern is on the outside. Do not flatten the shape, keep our bow nice and round. You can use a piece of tape or some glue to hold this shape in position.
Place the Bow Loop on top of the Bow Base; fold the Bow Centre piece around the centre of the two shapes. Press tightly to hold the shapes together.
___
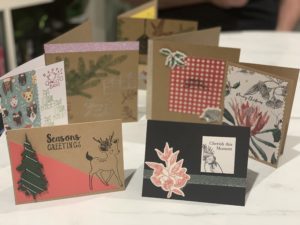
Homemade cards
BY KAITLYN, Community Development Manager
It’s always nice to take the opportunity to get in touch with family and friends to let them know you are thinking of them. Whilst you can always go and buy a card or write a letter on a blank piece of paper, I recently started making my own cards and I love it! Here are a few I have made recently.
I try to keep it as cost effective as possible and some of my supplies include:
- blank cards and envelopes: I get mine from Kmart or Spotlight)
- some stamps and ink: I like using the rubber stamps, you can find them at Kmart, Spotlight, or any craft stores
- coloured paper / card: you can use scrapbooking paper but this can be expensive, so I like to get creative and look at recycling wrapping paper, old cards, even old books you have no use for anymore!
- Something to stick things down: double sided tape ($1.50 for 2 rolls from Kmart), craft glue, mounting tape, etc.
- scissors
You can keep things as simple or creative as you like, you can use more things or less. You can add glitter, Washi Tape, stickers, little ornaments / figurines. Whatever you like!
To create the cool 3-D effect on some of my cards I used mounting tape to attach things, this raises it off the card a little. To keep costs down, I usually craft with a friend and we split the cost of the supplies. This gives us a fun activity to do together and doesn’t cost an arm and a leg!
___
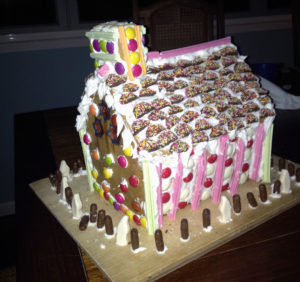
GINGERBREAD HOUSE
BY ALISON, General Manager-Operations
I haven’t made a ginger bread house for a few years, but I have many happy memories of decorating them with children. Now that my children are perhaps a little too grown up to decorate a house, I’m thinking I’ll bake the pieces for another family to put together and decorate.
- TIPS:
use dressmakers pins to hold the pieces together while the icing firms up. - You can either make the house shapes with a biscuit cutter if you have the right shapes, or you can find templates online to use and cut around them.
- Make sure all the cookies are fully cool before assembling otherwise the icing can melt and the house falls apart.
Follow the link for full recipe and instructions
___
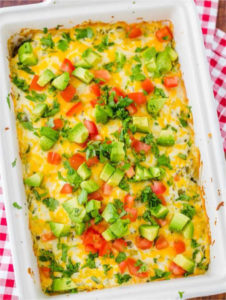
Mexican Chicken Bake
BY David, HOUSING Manager
My partner makes this dish all the time and it has become a little fav of ours. It’s easy to make and delicious! You can serve it with whatever you like and it’s so easily adaptable. If you feel like changing things up you can use steak instead of chicken, or even make it vegetarian! This is definitely one you should try.
Follow the link for full recipe and instructions
___
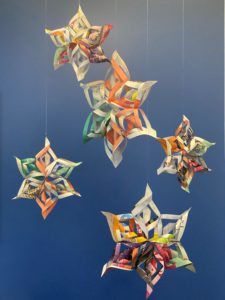
3D PAPER SNOWFLAKES
BY CORRINE, Marketing and Communications Officer
Residents who joined us out our Annual End of Year Tenant Event last year, may recognise these 3D Paper Snowflakes.
In an effort to recyle and re-purpose old copies of the Bugle, we created these beautiful, up-cycled decorations for the event.
This is a fun way to recycle old magazines and add a bit of colour to your home. Visit our website to learn how to make this papercraft.
Visit this link for step by step instructions